No edit summary |
|||
| (46 intermediate revisions by 16 users not shown) | |||
| Line 6: | Line 6: | ||
|conc= |
|conc= |
||
|next=[[Belly of the Beast]] or [[Shatter the Sky]] |
|next=[[Belly of the Beast]] or [[Shatter the Sky]] |
||
| − | |image= |
+ | |image=BattleChar SC2-WoL Story2.jpg |
| − | |imgsize= |
+ | |imgsize=200px |
| − | |conflict=[[ |
+ | |conflict=[[Second Great War]] |
| + | |campaign=[[StarCraft II: Wings of Liberty|Wings of Liberty]] |
||
| − | |date=[[2504]] |
+ | |date=Late [[2504]] |
|place=[[Char]] |
|place=[[Char]] |
||
| + | |result=*Terran forces establish a foothold on Char |
||
| − | |result= |
||
| + | *Warfield rescued by Raynor |
||
| + | *Terrans take heavy casualties |
||
|side1={{FlagRaynorsRaiders}} [[Raynor's Raiders]]<br/> |
|side1={{FlagRaynorsRaiders}} [[Raynor's Raiders]]<br/> |
||
{{FlagDominion}} [[Terran Dominion]] |
{{FlagDominion}} [[Terran Dominion]] |
||
| Line 18: | Line 21: | ||
|side4= |
|side4= |
||
|commanders1={{FlagRaynorsRaiders}} [[Jim Raynor]]<br/> |
|commanders1={{FlagRaynorsRaiders}} [[Jim Raynor]]<br/> |
||
| + | {{FlagRaynorsRaiders}} [[Matt Horner]]<br/> |
||
| + | {{FlagRaynorsRaiders}} [[Tychus Findlay]]<br/> |
||
{{FlagDominion}} [[Horace Warfield]] |
{{FlagDominion}} [[Horace Warfield]] |
||
|commanders2={{FlagKerrigan}} [[Infested Kerrigan]] |
|commanders2={{FlagKerrigan}} [[Infested Kerrigan]] |
||
| Line 49: | Line 54: | ||
|concatbott=x |
|concatbott=x |
||
}} |
}} |
||
| ⚫ | |||
| − | |||
| ⚫ | |||
==History== |
==History== |
||
===Dangerous Game=== |
===Dangerous Game=== |
||
| + | [[File:Starcraft II WoL - 1.32 - Dangerous Game|300px]]<Br/> |
||
| ⚫ | |||
In preparation for the assault on Char, Prince [[Valerian Mengsk]] not only acquired the components to a [[xel'naga]] artifact, but also took nearly half of the Dominion fleet as well. The prince was acting parallel to Emperor [[Arcturus Mengsk]], and neglected to share all the details with his father. Only upon reaching Char did Valerian reveal his intentions to Arcturus: to defeat the [[Queen of Blades]] and prove himself a worthy successor.<ref name ="SC2_CineDangerGames">Blizzard Entertainment. ''[[StarCraft II: Wings of Liberty]].'' (Activision Blizzard). PC. Cinematic: [[Dangerous Games]]. (in English). 2010.</ref> |
In preparation for the assault on Char, Prince [[Valerian Mengsk]] not only acquired the components to a [[xel'naga]] artifact, but also took nearly half of the Dominion fleet as well. The prince was acting parallel to Emperor [[Arcturus Mengsk]], and neglected to share all the details with his father. Only upon reaching Char did Valerian reveal his intentions to Arcturus: to defeat the [[Queen of Blades]] and prove himself a worthy successor.<ref name ="SC2_CineDangerGames">Blizzard Entertainment. ''[[StarCraft II: Wings of Liberty]].'' (Activision Blizzard). PC. Cinematic: [[Dangerous Games]]. (in English). 2010.</ref> |
||
| Line 61: | Line 65: | ||
===The Battle=== |
===The Battle=== |
||
====Gaining a Foothold==== |
====Gaining a Foothold==== |
||
| ⚫ | |||
The initial landing was a near disaster. Most battlegroups were destroyed before reaching the surface, and those that survived were badly scattered. The chaos was aggravated by communication difficulties between ground units and higher command.<ref name="WoL_GatesOfHell"/> |
The initial landing was a near disaster. Most battlegroups were destroyed before reaching the surface, and those that survived were badly scattered. The chaos was aggravated by communication difficulties between ground units and higher command.<ref name="WoL_GatesOfHell"/> |
||
Jim Raynor took command of his sector and rallied terran forces in reach in order to have a chance to assault the [[zerg]], as terran casualties escalated both in the ground and in orbit. Several Dominion units, continuing to land by [[drop pod]], were rescued by [[Raynor's Raiders]] from the zerg and attached themselves to the rebels in the absence of orders.<ref name="WoL_GatesOfHell"/> |
Jim Raynor took command of his sector and rallied terran forces in reach in order to have a chance to assault the [[zerg]], as terran casualties escalated both in the ground and in orbit. Several Dominion units, continuing to land by [[drop pod]], were rescued by [[Raynor's Raiders]] from the zerg and attached themselves to the rebels in the absence of orders.<ref name="WoL_GatesOfHell"/> |
||
| + | [[File:Helios SC2 Game2.jpg|thumb|left|''Helios'' crash landed on Char.]] |
||
| ⚫ | |||
| − | As [[Jim Raynor]] |
+ | As [[Jim Raynor]] pulled in troops to secure a perimeter, General [[Horace Warfield]] crash landed nearby aboard the [[battlecruiser]] ''{{link|Helios|battlecruiser}}''. The crew dug in as the zerg pressed in.<ref name="WoL_GatesOfHell"/> |
| + | {{Clear}} |
||
| ⚫ | |||
| ⚫ | |||
| + | [[File:StarCraft 2 - Card to Play Cinematic|425px]]<br/> |
||
| ⚫ | The Raiders sortied to relieve the beleaguered battlecruiser. They made it just as the zerg were overrunning the survivors. Jim Raynor and Tychus Findlay personally rescued a wounded General Warfield.<ref name ="SC2_CineCardToPlay">Blizzard Entertainment. ''[[StarCraft II: Wings of Liberty]].'' (Activision Blizzard). PC. Cinematic: [[Card To Play]]. (in English). 2010.</ref> |
||
===Aftermath=== |
===Aftermath=== |
||
| + | :''See also: ''[[StarCraft II: Wings of Liberty campaign quotations/Final Missions#Gates of Hell|campaign quotations]]'' |
||
| − | Raynor's Raiders established a foothold on Char.<ref name="WoL_GatesOfHell"/> |
||
| + | The terrans had their [[Warfield Forward Base|foothold]], but at heavy cost. A push on the main hive was urgently needed before their strength was depleted against the numerically superior zerg.<ref name ="SC2-WoL_StoryFindlay">Blizzard Entertainment. ''[[StarCraft II: Wings of Liberty]].'' (Activision Blizzard). PC. [[Tychus Findlay]] (in English). 2010.</ref> |
||
{{Next|Belly of the Beast}} |
{{Next|Belly of the Beast}} |
||
{{Next|Shatter the Sky}} |
{{Next|Shatter the Sky}} |
||
| − | ==Gameplay== |
+ | ==Gameplay & Video Walkthrough== |
| + | [[Supply depot]]s are not required for this mission. Over the course of the mission, [[drop pod]] "reinforcements" with increasingly powerful units arrive across the map. They become part of the player's army when player units move to their position. The reinforcements may be destroyed by the zerg if not rescued fast enough. Pods continue dropping after Warfield arrives. The final four pods drop in pairs, each arriving at a different location. When one of the pairs is rescued, the other is automatically attacked, forcing the player to divide the rescue team into two. Rescuing the early pods can help toward reaching the first army-building objective, and bring in production structures. |
||
| − | A number of drop pods arrive at certain locations across the map. The player has the choice to "greet" their arrival, or abandon them to the Zerg. If the player chooses the latter, it is unlikely that soldiers in drop pods will have the chance of surviving encounter with the Zerg, thus hindering their availability to join player's army. The last few drop pods come in waves in different parts of the map, making it extraordinarily difficult to collect all the troops. |
||
| + | There are [[spore cannon]]s scattered around the map. Destroying these yield additional resources. |
||
| − | Halfway through the mission, General Horace Warfield attempts an emergency landing due to his ship being severely damaged by the Zerg. The player must destroy 3 nydus worms blocking Warfield's defense perimeter from the player's main base. |
||
| + | |||
| + | Destroying the three [[nydus worm]]s near Warfield's crashed battlecruiser is the final objective. |
||
| + | |||
| + | [[File:The Gates of Hell Starcraft II Brutal Mode Walkthrough (HD - Max Settings)|thumb|625px|Brutal Mode Walkthrough]] |
||
| + | {{clear}} |
||
==Achievements== |
==Achievements== |
||
| + | {| |
||
| ⚫ | |||
| + | |-valign="top" |
||
| ⚫ | |||
|name=Gates of Hell |
|name=Gates of Hell |
||
|bgcolor=blue |
|bgcolor=blue |
||
| Line 97: | Line 113: | ||
|editname= |
|editname= |
||
}} |
}} |
||
| ⚫ | |||
| − | |||
| ⚫ | |||
|name=The Big Bang Cannon |
|name=The Big Bang Cannon |
||
|bgcolor=blue |
|bgcolor=blue |
||
| Line 109: | Line 124: | ||
|campaign= |
|campaign= |
||
|mission= |
|mission= |
||
| − | |criteria=Destroy all [[ |
+ | |criteria=Destroy all [[spore cannon]]s on Normal difficulty |
| − | |note=The spore cannons |
+ | |note=The spore cannons may be identified by the large green blobs they hurl into the sky and off the screen. Most may be found while picking up the drop pods. |
|editname= |
|editname= |
||
}} |
}} |
||
| + | |} |
||
| − | |||
{{AchieveBox |
{{AchieveBox |
||
|name=Dominion Roundup |
|name=Dominion Roundup |
||
| Line 126: | Line 141: | ||
|mission= |
|mission= |
||
|criteria=Rescue 10 [[Drop pod|Drop-Pods]] of Dominion Troops on Hard difficulty |
|criteria=Rescue 10 [[Drop pod|Drop-Pods]] of Dominion Troops on Hard difficulty |
||
| − | |note=The first 6 |
+ | |note=The first 6 pods arrive individually and may be picked up in sequence. The last 4 drop in pairs. Reaching one pod causes a large zerg force to move in and destroy the other, so each pod in a pair must be rescued simultaneously. A pod is rescued by moving a player-controlled unit to it; dropped [[Mobile utility lunar excavator|MULE]]s can rescue pods. With the last four pods there are zerg units nearby. Upon rescue these units will attack and will destroy the rescued units unless you send units to help them. |
|editname= |
|editname= |
||
}} |
}} |
||
| + | {{clear|left}} |
||
| − | |||
{{achievements}} |
{{achievements}} |
||
{{clear}} |
{{clear}} |
||
==References== |
==References== |
||
| + | {{ref}} |
||
| − | <references/> |
||
{{Wings of Liberty}} |
{{Wings of Liberty}} |
||
Revision as of 22:41, 20 June 2013
Gates of Hell is a StarCraft II: Wings of Liberty mission.[1]
History
Dangerous Game

In preparation for the assault on Char, Prince Valerian Mengsk not only acquired the components to a xel'naga artifact, but also took nearly half of the Dominion fleet as well. The prince was acting parallel to Emperor Arcturus Mengsk, and neglected to share all the details with his father. Only upon reaching Char did Valerian reveal his intentions to Arcturus: to defeat the Queen of Blades and prove himself a worthy successor.[2]
The emperor was pleasantly surprised by his son's initiative and daring, but doubted whether Valerian had the experience to succeed. On the other hand, Arcturus was unpleasantly surprised to find Valerian had entered into an alliance with Jim Raynor, and Raynor's Raiders. Nonetheless, it was too late for the emperor to recall the expedition.[2]
The Battle
Gaining a Foothold
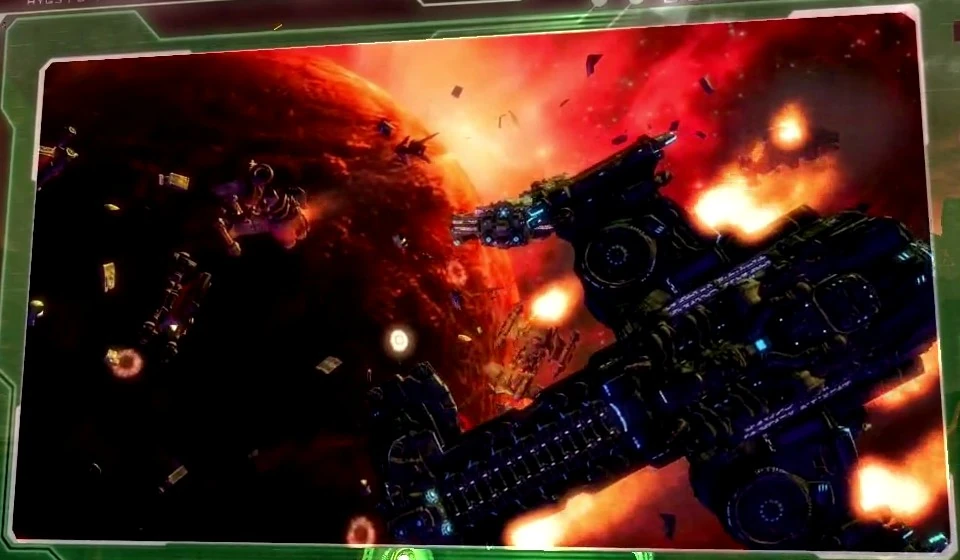

The fleet embattled in orbit.
The initial landing was a near disaster. Most battlegroups were destroyed before reaching the surface, and those that survived were badly scattered. The chaos was aggravated by communication difficulties between ground units and higher command.[1]
Jim Raynor took command of his sector and rallied terran forces in reach in order to have a chance to assault the zerg, as terran casualties escalated both in the ground and in orbit. Several Dominion units, continuing to land by drop pod, were rescued by Raynor's Raiders from the zerg and attached themselves to the rebels in the absence of orders.[1]
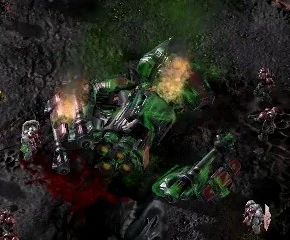
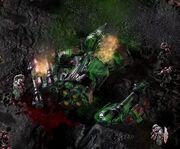
Helios crash landed on Char.
As Jim Raynor pulled in troops to secure a perimeter, General Horace Warfield crash landed nearby aboard the battlecruiser Helios. The crew dug in as the zerg pressed in.[1]
Card to Play

The Raiders sortied to relieve the beleaguered battlecruiser. They made it just as the zerg were overrunning the survivors. Jim Raynor and Tychus Findlay personally rescued a wounded General Warfield.[3]
Aftermath
- See also: campaign quotations
The terrans had their foothold, but at heavy cost. A push on the main hive was urgently needed before their strength was depleted against the numerically superior zerg.[4]
| The next article in this series is Belly of the Beast. |
| The next article in this series is Shatter the Sky. |
Gameplay & Video Walkthrough
Supply depots are not required for this mission. Over the course of the mission, drop pod "reinforcements" with increasingly powerful units arrive across the map. They become part of the player's army when player units move to their position. The reinforcements may be destroyed by the zerg if not rescued fast enough. Pods continue dropping after Warfield arrives. The final four pods drop in pairs, each arriving at a different location. When one of the pairs is rescued, the other is automatically attacked, forcing the player to divide the rescue team into two. Rescuing the early pods can help toward reaching the first army-building objective, and bring in production structures.
There are spore cannons scattered around the map. Destroying these yield additional resources.
Destroying the three nydus worms near Warfield's crashed battlecruiser is the final objective.

The Gates of Hell Starcraft II Brutal Mode Walkthrough (HD - Max Settings)
Brutal Mode Walkthrough
Achievements
|
| ||||||||||||||||
| Points |
10 (Final Mission) |
| Criteria |
Rescue 10 Drop-Pods of Dominion Troops on Hard difficulty |
| Notes | |
|
The first 6 pods arrive individually and may be picked up in sequence. The last 4 drop in pairs. Reaching one pod causes a large zerg force to move in and destroy the other, so each pod in a pair must be rescued simultaneously. A pod is rescued by moving a player-controlled unit to it; dropped MULEs can rescue pods. With the last four pods there are zerg units nearby. Upon rescue these units will attack and will destroy the rescued units unless you send units to help them. | |
References
- ↑ 1.0 1.1 1.2 1.3 Blizzard Entertainment. StarCraft II: Wings of Liberty. (Activision Blizzard). PC. Mission: Wings of Liberty, Gates of Hell (in English). 2010-07-27.
- ↑ 2.0 2.1 Blizzard Entertainment. StarCraft II: Wings of Liberty. (Activision Blizzard). PC. Cinematic: Dangerous Games. (in English). 2010.
- ↑ Blizzard Entertainment. StarCraft II: Wings of Liberty. (Activision Blizzard). PC. Cinematic: Card To Play. (in English). 2010.
- ↑ Blizzard Entertainment. StarCraft II: Wings of Liberty. (Activision Blizzard). PC. Tychus Findlay (in English). 2010.