
|
You may be looking for:
|
"Oh, no... that's what I keep you around for ...sir."
- Jim Raynor and Matt Horner(src)
Matthew[4] "Matt" Horner is Jim Raynor's second-in-command and captain of the Raynor's Raiders' flagship Hyperion.
Biography
The Sons of Korhal
Matt Horner, the second son of a minor Tyrador IX merchant, lived a boring and safe life, all the while yearning for something more. Horner found that something in the tales of a trader working for the Sons of Korhal, actively recruiting new members. He spoke of the "evil empire" that was the Terran Confederacy and gave praise to those who plotted its downfall. Intelligent, but bored, youthful and idealistic, Horner was the perfect target and he found himself supporting the SOK's cause,[5] wanting "to make a difference."[6]
Following the rebel group's advice, Horner enlisted in the Confederate Navy, where he excelled as a pilot. After graduating with honors, he deserted the Confederacy and joined the Sons of Korhal full time. He was posted on the Cormorant, a merchantman converted for blockade running. The vessel enjoyed a great deal of success in its evasion of Confederate patrols and its transport of men and material between star systems, earning Horner a reputation of being clever and dependable.[5]
The Great War
Rebel Yell
"Um, it's Matt Horner, sir."
"Matt? I thought it was Jack."
"Everyone does, sir. And no, I don't sit in the corner eating pie. Also...I hate plums."
- Raynor and Horner during the Orna III mission(src)
By the time Mar Sara entered its dying days as the Great War raged, Horner had become the Cormorant's first officer. The vessel was called to the Fringe World to assist in the evacuation carried out by the Sons of Korhal, rescuing citizens the Confederacy had left to die. Horner was assigned to work with Arcturus Mengsk's newest recruit, Captain Jim Raynor. Horner quickly grew to admire Raynor's bravery and loyalty.[5]
After the glassing of Antiga Prime, Horner was part of a mission to Orna III that included Raynor and the SoK's second-in-command, Sarah Kerrigan. Their goal was to rescue test subjects and unwilling scientists from a science facility on its surface. Kerrigan assured him that the rumors of the unethical experiments and torture going on in the base were true, and explained how she would know which scientists were worth saving through her telepathy. The plan was that she would pose as a Confederate ghost with Raynor as a convict being taken in for inclusion in the experiments. Using obtained blueprints, Horner would guide them through the facility from the Cormorant. The plan was a success, with the test subjects and willing scientists escaping with the rebels, and the facility being destroyed.[7]
After Orna III was Tarsonis. In the battle that followed, Mengsk used psi emitters to lure the zerg en masse to the planet, destroying the center of Confederate power, but also causing the deaths of many innocents. Horner was disgusted — it seemed to him that one tyrannical regime had merely been replaced by another, one with Mengsk at its head.[5] Raynor, also disgusted at Mengsk's genocidal actions and his betrayal of Sarah Kerrigan, broke away from the Sons of Korhal, with many of his men following him.[6] Of those who followed, Horner was among the first.
Raynor's new armed force, Raynor's Raiders, seized Mengsk's flagship, the Hyperion at the Dylarian Shipyards. Horner was assigned to run the ship and eventually become the captain.[5]
Char
"Sir? Yessir! A new base of operations! A launching point for the revolution! A rallying ground for the-..."
"No, just a planet."
- Jim Raynor and Matt Horner(src)
Two months after the Fall of Tarsonis, Horner found himself over the planet of Char, following Raynor's command. Horner stayed behind on the Hyperion while the bulk of the Raiders descended to the surface. However, Horner was unable to wait for them to return, as zerg under a now Infested Kerrigan's direction had hijacked a number of shuttles in order to board the terran ships in orbit, the Hyperion included. Unable to prevent the shuttle from docking, Horner, as per Raynor's orders, was ordered to perform an emergency warp jump, despite the dangers such a reckless action entailed. However, Horner was able to make the jump with minimal damage to the ship. After several months of repairs, Horner managed to return to Char, providing transport for the remaining Raiders.[6]
Dark Times


Matt Horner
Over the years, Horner took control of the Raiders' small fleet and many military aspects of Raynor's campaigns. Horner became hardened by his experiences, but his ideals and resolve remained undimmed, even in the face of Dominion propaganda. Despite Raynor's doubts spreading to his crew, Horner kept faith in his commander and his belief that Raynor's innate heroism would resurface and lead the rebels to victory.[5] To that end, he tried to act as Raynor's conscience while keeping him focused and "firing up" the Raiders.[8]
During this period, Horner made a stop at Deadman's Port, taking part in a poker game. What he didn't know[9][10] was that the "prize" was actually a wife—Mira Han. Horner had no interest in being married to Han and actively avoided her afterward.[4] However, she reguarly sent him information about which channels were secure, just in case he ever felt like contacting her.[7] Which he didn't.[4]
At the same site, he and Raynor rescued Egon Stetmann, a rebellious scientist, from criminals who wished to execute him for refusing to work with them.[11]
Wings of Liberty
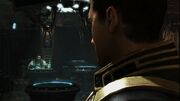
By 2504, Horner still served as Raynor's first officer. Now in his early twenties[12] and his demeanor far more formal than it was previously,[13] events repeated themselves at Mar Sara, with the zerg returning to the Koprulu sector. Horner brought the Hyperion down to the planet, rescuing Raynor and his men from the Swarm and making a successful escape. He subsequently briefed his superior on the greater zerg invasion of the sector.[14]
Horner was distrustful of new arrival Tychus Findlay, a convict and an old friend of Raynor. Raynor assured Horner there was nothing to worry about,[9][15] but Horner's suspicions remained, especially when he found Findlay accessing the Hyperion's archive without permission.[16] Regardless, Findlay led the Raiders to the world of Xil for another artifact, with Horner providing support.[17]

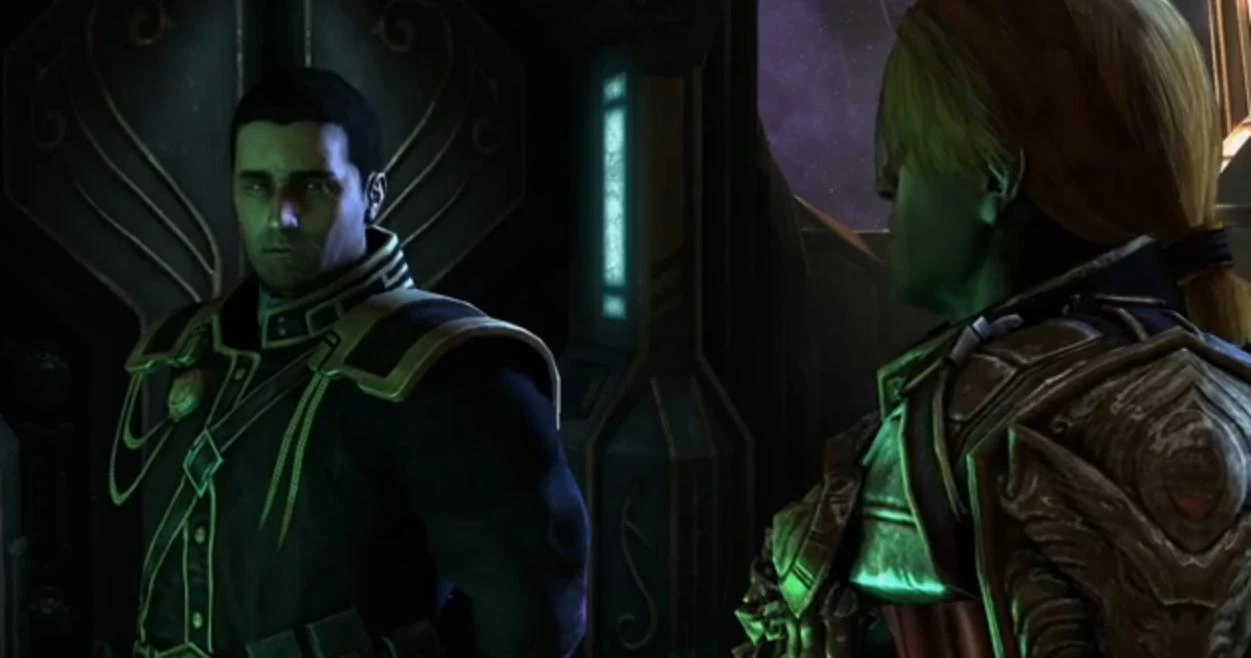
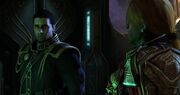
Horner confronts Raynor
Horner continued to be concerned with Raynor's poor psychological state. After fighting Kerrigan on Tyrador VIII to assist the Moebius Foundation, Horner tried again to counsel his friend to let go of the misplaced guilt over Kerrigan's infestation. Raynor refused to listen, as expected, and continued to find solace in alcohol. Raynor was presented with his old Confederate marshal's badge as a reminder of what he was capable of. Horner assured him the crew still had faith in him and that they needed his leadership.[18] It was a tactic that paid off and Raynor returned to an effective leadership position.[9][19]
Spectre of Unease

|
This article or section contains information from the optional Covert Missions in StarCraft II: Wings of Liberty.
|
- Matt Horner to Gabriel Tosh(src)
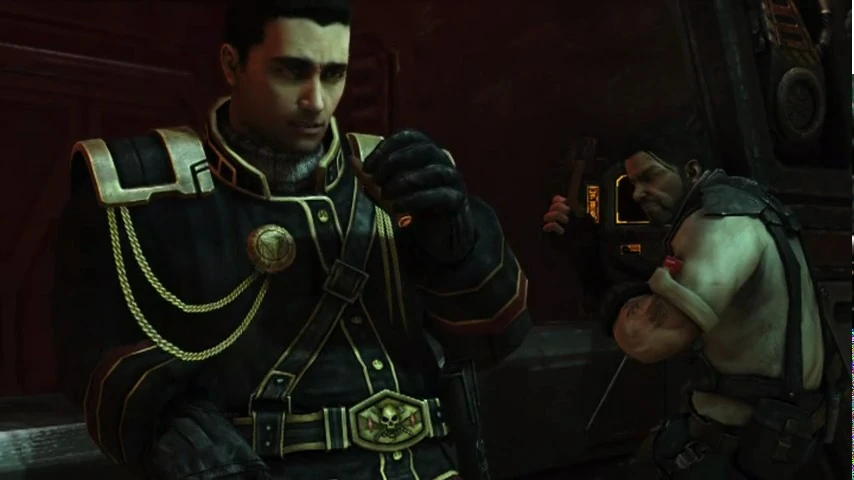
To obtain the credits needed for continued actions, the Raiders agreed to take on a mining job on Redstone III, offered by Gabriel Tosh.[20] Tosh joined the crew and through research on his background, Horner discovered that Tosh was a former ghost.[9]
After a mission on Bel'Shir, Horner received an anonymous transmission explaining that Tosh was part of a classified operation called Project: Shadowblade, which used jorium and terrazine to enhance ghosts into spectres. Tosh admitted to being a spectre, but claimed the transmission came from Mengsk in an attempt to divide them. Raynor agreed to let the matter pass, but wasn't sure if he could trust Tosh.[21]
Later, Horner received a transmission from Nova, who was revealed to be a Dominion assassin. Nova told them that spectres were mentally unstable, and Raynor was forced to choose between trusting Tosh or her.[22][23]
Horner and Tosh discuss motivations
Raynor sided with Tosh and after New Folsom Prison was broken out, Horner and Tosh disagreed on motivations. He believed the Raiders' cause was one of freedom, not wanton destruction or revenge. In this he contrasted with Tosh whose goal was simply to "kill Mengsk and burn his Dominion to the ground." Raynor assured his XO that his dream of a better future would become a reality, but that people like Tosh and the former marshal weren't meant for it.[24]
Raynor helped Nova destroy the spectre training facility on Avernus Station. Tosh escaped and contacted Raynor remotely. Horner watched uneasily as the spectre attempted and failed to harm Raynor with a voodoo doll in the rebel's likeness. Nova assassinated the spectre while he was talking; Horner witnessed this with distaste. After Tosh's assassination, Horner jokingly asked Raynor why he never met "normal girls."[25]
The Revolution

|
This article or section contains information from the optional Rebellion Missions in StarCraft II: Wings of Liberty.
|
- Matt Horner(src)
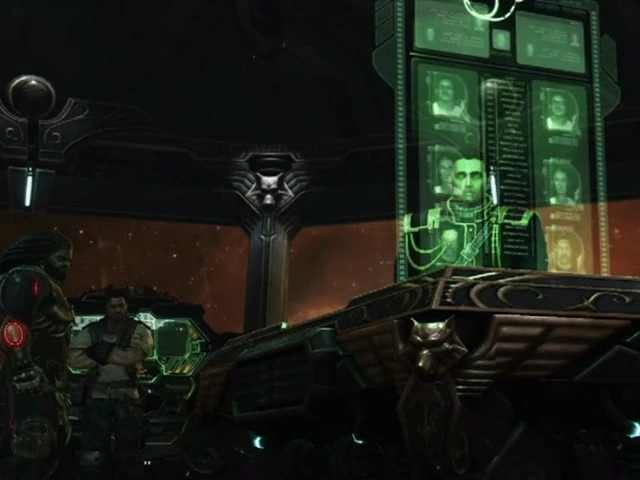
A rebel informant discovered that the Dominion found something unusually valuable in their continuing excavations of Tarsonis. Horner passed this on to Raynor, who approved a raid to steal it. The Raiders attacked a number of trains and found the object in question: Adjutant 23-46.[26] The Raiders hired their old mercenary associate Colonel Orlan to decrypt it at Deadman's Port.[9][27]

Horner isn't available
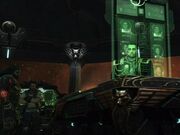
Orlan decided to betray the Raiders and sell the adjutant to the Dominion. Horner and Raynor became suspicious as Orlan delayed. This was confirmed by Han; who was hired by Orlan to prevent the Raiders from interfering with his new deal. However, she was more inclined to cooperate with Raynor and Horner, and offered to allow the Raiders to buy out her contract with Orlan. The Raiders agreed and with Han's assistance recovered Adjutant 23-46. The reunion with Han was awkward for Horner and he abstained from speaking with her, despite her willingness, which amused Raynor.[4]
The adjutant contained information proving Mengsk's hand in the Fall of Tarsonis. With the decrypted information on hand, Horner formed a plan to broadcast it throughout the Dominion. Using information given by Han, he proposed raiding the Dominion's Valhalla installation and stealing the Odin, a prototype heavy assault walker, and using it to seize the UNN Studios on Korhal. The war machine was duly commandeered by Findlay and the immediate Dominion presence was suppressed to keep the heist a secret.[28]
Horner and Raynor celebrating their victory
The Raiders traveled to Korhal with the Odin. The Dominion thought the walker was still under their control and intended to unveil it in a massive public relations demonstration in Korhal City. Piloted by Findlay, the Odin led the attack on the defenses surrounding the UNN Studios and allowed the Raiders to broadcast the adjutant's incriminating information using the local broadcast towers.[29] The results were entirely satisfactory. Dominion citizens expressed their moral outrage through demonstrations and riots against the emperor. For Horner, this marked the true beginning of the revolution after years of frustration.[30]
During their media raid, documents uncovered pointed to the presence of an old Dominion bio-weapons lab orbiting Castanar. Raynor led a raid on the platform with Horner providing support from afar. It was discovered that Mengsk was involved in protoss-zerg hybridization.[31]
Raynor suspected that Mengsk had his hand in the "end of the world." The technology the Dominion used was too complex, so Horner suggested that Mengsk had help.[9][32]
Horner theorized that Mengsk might be trying to create subservient super-soldiers, but reasoned that the technology involved was beyond what terrans possessed.[9][32]
Dealing with the Devil
"You signed up to follow my orders! If you can't do that anymore then get the hell off my ship!"
- Horner and Raynor in light of the latter's alliance with Valerian Mengsk(src)
Horner's faith in Raynor was sorely tested after the recovery of the fourth xel'naga artifact from Typhon XI.[33] The Raiders were unaware that the Foundation was owned by Crown Prince Valerian Mengsk. When the Foundation arranged to meet the Raiders after Typhon XI, the prince went to meet Raynor personally, aboard the Dominion flagship Bucephalus complete with an escort of battlecruisers.
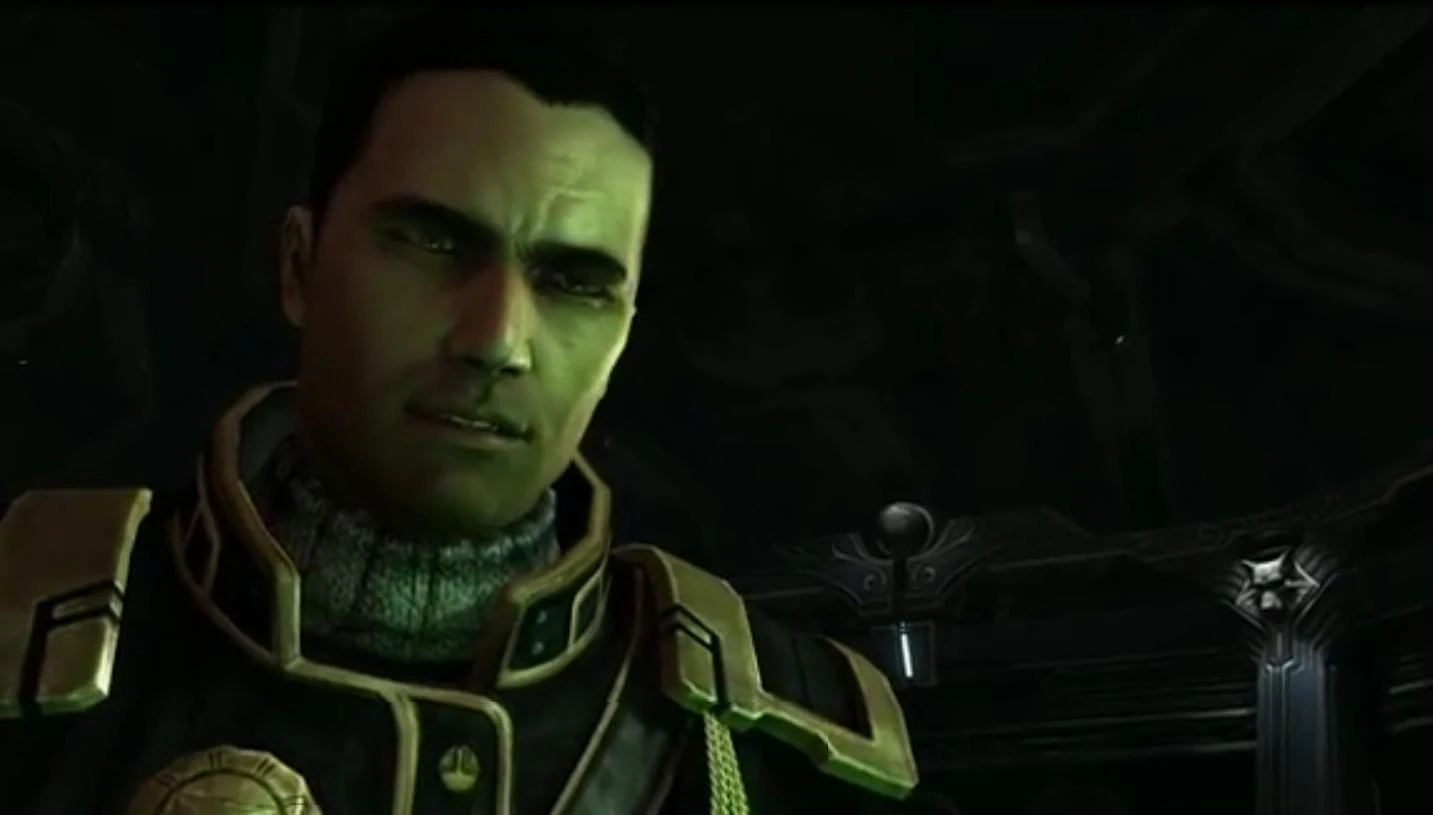
Horner observes the tactical display of the Dominion battlecruisers
The Raiders were alarmed by the arrival of the Dominion Fleet. Raynor immediately ordered the Hyperion to go along side Bucephalus for a boarding action. Horner thought this was unwise. Furthermore, he sensed something was amiss as the enemy warships had not raised their energy shields. Nonetheless, he was unable to persuade his commander to reconsider. Ultimately, Raynor confronted Valerian aboard Bucephalus. Valerian convinced Raynor to join forces for a strike on Char, aimed at using the xel'naga device to deinfest Kerrigan.[34]
Horner believed an assault on Char was suicidal, the alliance with the Dominion unethical, and a trap. He feared the recent momentum against Mengsk would be lost in an operation he saw as aimed solely to assuage Raynor's personal demons. In a heated exchange, Raynor demanded either Horner's obedience or resignation. Horner uneasily let his commander have his way.[9][35]
Other crew members were equally apprehensive, and things came to a head after recovering the last component from a xel'naga worldship in the Sigma Quadrant.[36] Faith was generally restored in Raynor's leadership after he beat a drunk Findlay in brawl in Hyperion's cantina. The rebel leader was finally able to convince his followers that the alliance was temporary and removing the Queen of Blades from her position was for every terran.[37] With the intra-Raider belligerence fading, and smugly pleased that Findlay had been put in his place, Horner was willing to allow Valerian to prove himself, rather than assume he was the same as his ruthless father.[9][38]
Return to Char
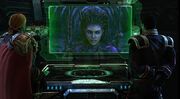
During the assault on Char, Horner provided advice and support for Raynor from the Hyperion. He tracked Dominion drop pods during the initial landing so Raynor could rescue the landing troops.[39] When the terrans dug in at the base of the primary hive cluster, Horner appraised them of incoming attacks. The defenses held and the xel'naga device deinfested Kerrigan.[40]
Flashpoint
Choosing Sides
"Oh, please, sir. I'd rather work double shifts."
- Raynor and Horner in light of having to return to Deadman's Port(src)
After Kerrigan's de-infestation, Raynor radioed Horner for a dropship. Horner was astounded that the device had worked, but got back to work, informing Raynor that without Kerrigan's control, the zerg had lost cohesion. Horner sent a dropship down while also planning the best route for the Raiders to take to it. Events became more complicated when the other half of the Dominion Fleet, led by Arcturus Mengsk himself, warped into the Char system. With Valerian refusing to turn over Kerrigan to his father, the two halves of the fleet opened fire on each other. From the outset, Mengsk's fleet had the advantage, for Valerian's had taken damage and casualties through fighting the zerg.
Horner ordered that the Hyperion begin firing toward the zerg, but not at them, in order to lure them away from the Dominion ships. The plan worked, and Horner sent a message to Valerian's ship, to "watch out for stray dogs." Meanwhile, the ship went on an intercept course towards the White Star, Mengsk's flagship. The White Star fired its Yamato cannon and scored a glancing hit. But that was part of Horner's plan, and with it opening fire, the zerg that had been attacking the Hyperion now closed in on the White Star. It was the distraction that the Raiders/Dominion renegade fleet needed, and they made for clear space coordinates. The rebel fleet thus warped out.
In the aftermath, Horner met with Raynor and Valerian on the Hyperion's bridge, describing the events of the battle. Valerian declared his intention to take Kerrigan to Doctor Emil Narud for study. Horner protested that they already had Egon Stetmann, a good scientist, with them, but Valerian maintained that Narud was their best bet. Raynor ended up siding with Valerian. It was at this point that Mengsk's fleet caught up with the rebels. Not wasting time, Horner ordered the ship's crew to their battle stations. A new battle began, and Raynor ordered Horner to set new jump coordinates. Several minutes later, Horner was able to set and transmit them, and the ships jumped again, but lost the Antigone in the process.
By this point, it was clear that Mengsk was tracking the rebels through electronic devices, and the rebels would need a place to lie low while they were removed. Meeting with Raynor and Valerian (and expressing his regret over the Antigone), Horner suggested that they head for Deadman's Port. As Raynor pointed out, the Dominion held no sway over Dead Man's Rock, and if they were offered shelter, it was unlikely that Mengsk had the firepower to follow up with an immediate assault. And besides, they had Mira Han there as well. It wasn't something that Horner particuarly wanted to do, but he was willing to do it for the Raiders (though not Valerian, as he pointed out). The plan was set, but they still had to deal with the probability that Mengsk's fleet would come warping in on them at any moment. Horner already had a plan for that, and when Mengsk arrived, it was ennacted—after having its crew evacuated, the Herakles (the last of Valerian's allied ships) was sent in a collission course with the White Star, dealing heavy damage. With that, the rebels had been brought time. Time enough to head to Deadman's Port.[7]
Deadman's Port
- Han to Valerian in light of Horner's arrival(src)
Horner got in touch with Mira, who was more than happy to help her "dear, sweet husband." At least, to an extent. She warned that the Raiders couldn't stay indefinately, nor would she fight the Dominion for them. It was decided to hide the battlecruisers in junkyards—a prospect that Valerian objected to, but Horner allayed his fears. The ships landed, and Horner, Valerian, and Raynor met Han on foot. Horner's 'wife' declared that they could now make up for lost time, a prospect that Horner was unenthused about. Han agreed to give "the woman" (Kerrigan) a safehouse, while she and Horner caught up on things.
An hour later the rebels and merc were at the former residence of deceased crime lord Scutter O'Bannon. Seeing that Raynor and his patient were set up, Han offered Horner a "long, long drive, to "pretty and private places." Horner pointed out that Han had promised Valerian a secure channel, which postponed matrimonial affairs for a bit. To that end, Horner headed back to the Hyperion—Han had a secure channel, only it was based in a bunker five killometers away. They would have to walk, and as Horner pointed out, Valerian hardly looked like the type of person one would find in Deadman's Port. Half an hour later, Valerian looked the part, though Horner wasn't convinced. Losing patience, Valerian pointed out that while it was clear Horner disliked and distrusted him, they could at least work together. And besides, the trip would keep him out of Han's hands for the forseeable future.
The two set out. It didn't take long for a thug to try his luck, but in a shorter amount of time, Valerian sent him packing. Horner's estimation of Valerian rose a little, as he hadn't expected the prince to be able to handle himself as well as he did. His estimation of Han rose also as Valerian pointed out that he'd seen food being shared by Mira's Mercs. Finally, the two reached the bunker, meeting the mercs that had been waiting for them. Valerian was able to contact Dr Narud. Along with Raynor, they met with the scientist in a bar, where debate ensured as to how Kerrigan would be treated, and where she would be taken. The meeting was interrupted as members of Mira's Mercs turned on the group. They were able to make a break for it, though Horner took a gauss round through the arm.
Raynor led them into a prefab home and took the time to dress Horner's wound, finding that an artery had been hit. Contacting Han, she informed them of an escape route that was open to them. Horner's blood loss, coupled with the mercs' use of smoke grenades, got to him, and he passed out. Valerian carried him to safety, and Han's open arms. Han treated his wound and kissed him, and due to the euphoria brought about by blood loss, Horner found himself kissing back. Through a transport ship, the rebels got back to their battlecruisers and entered warp space. In the Hyperion's sick bay, Horner's artery was repaired and he was given a blood transfusion.[7]
Space Station Prometheus
It didn't take long for Horner to return to active duty. Nor did it take long for the battlecruisers to arrive at their destination—the Kirkegaard Belt, a dense, hard to navigate asteroid field. Valerian explained that the belt housed Space Station Prometheus, a secret Moebius Foundation base. According to Valerian, there was a way to navigate the belt, though it would require very precise navigation. Horner refused, claiming that such a thing might be possible for smaller ships, but not ones the size of battlecruisers. Valerian pressed the point, and offered to take the Bucephalus in first with the Hyperion following. Raynor took Valerian's side, and Horner agreed to the plan.
As the ships headed through, Horner noticed that Raynor was agitated, torn between being on the Hyperion, or being with Kerrigan aboard the Bucephalus. Horner told him to go to Valerian's ship—it was where Raynor wanted to be, and seeing their leader take the lead would be good for crew morale. Eventually, the ships arrived, though Horner stayed onboard the Hyperion as Moebius teams carried out repairs. Residing on the ship's bridge, Marcus Cade alerted him to incoming ships, located on the edge of the asteroid field. He ordered that the repairs be stopped, and was alerted soon afterwards by Annabelle Thatcher that the ship's power cells were being drained, and that their contact with the Bucephalus was being jammed. Nor could they contact Raynor on Prometheus. And to make matters worse, the ships were now entering the asteroid field.[7]

|
Heart of the Swarm
Horner continued to command the Hyperion during the events following Kerrigan's deinfestation.

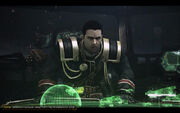
Horner takes command
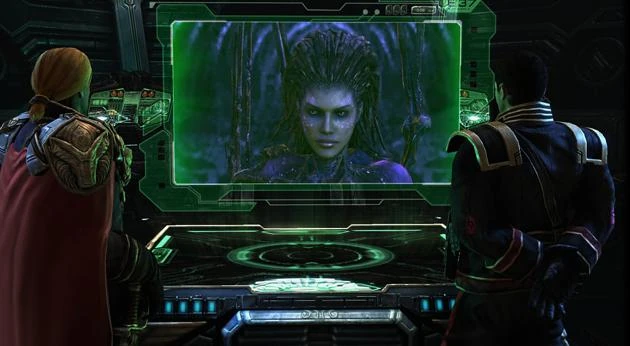
When Raynor was lost in a Dominion raid on Research Station EB-103, Kerrigan attacked Valerian with a psionic choke, holding him guilty for failing to escort Raynor to safety. Horner calmed her down — just when a Dominion fleet warped around the Hyperion and opened fire. Having failed to negotiate with the Dominion fleet, even despite announcing Valerian's presence on board, Horner ordered the Raiders fleet to escape. Kerrigan, however, had other plans and parted ways with the Raiders, embarking on a personal quest to find Raynor and execute her revenge against Mengsk.[41] As she headed down to the planet Phaeton, Horner informed her that before the Hyperion had jumped, they had detected numerous Dominion signatures headed toward the surface also.[42]
Horner and Valerian plan Raynor's rescue
In the light of Raynor's absence and alleged execution, the Raiders temporarily fell under the joint leadership of Horner and Valerian. Things changed when Kerrigan discovered that Raynor was still alive, contacting Valerian on the Hyperion and pleading to find him by hacking the Dominion network. Valerian was skeptical as to whether Kerrigan could be trusted, but Horner stated that if there was any chance that Raynor was alive, he would take it.
As the only person who could hack the Dominion security network to find Raynor was Colonel Orlan, Horner was forced once again to deal with Mira Han, much to his chagrin. Negotiations with Mira failed, as she refused to deal with anyone but Raynor himself. Horner then piloted the Hyperion into an asteroid field where Han ran her mineral mining operations. Only after the destruction of several of her space stations did she agree to turn Orlan over.[43]
With Orlan's help, the Raiders were able to find where Raynor was being held—the Moros, a prison ship. They knew it would be resupplying at Atlas Station, which would give them a chance to mount a rescue mission. Kerrigan declared that she would handle it. Horner warned her that the ship's security was even greater than that of New Folsom Prison. As Kerrigan attacked, Horner advised her to retrieve the ship's security log.[44]
Valerian, Horner, and Kerrigan discuss the upcoming invasion
Later, as Kerrigan brought the Zerg Swarm down on Korhal, Horner and Valerian Mengsk collaborated to evacuate as many civilians as possible.[45][46] As Kerrigan neared Mengsk's palace and wreaked havoc on the Imperial sector, Valerian requested she limit collateral damage so he and Horner could fulfill their task. Kerrigan grudgingly complied, allowing Horner to coordinate refugees as Raynor aided Kerrigan on the front lines.[47]
Game Unit
StarCraft II
Horner commands the Hyperion in a single mission in Heart of the Swarm.
Quotations
Personality and Traits
Horner has strong moral principles. He desires to make the universe a better place, and opposes the murder and torture of innocents. He is not only a fair combatant but also an excellent ship pilot and a decent starship tactician.[5] He is more "clean cut" in terms of appearance/attire than many of the other Raiders. In Mira Han's view, Horner is tough in "his own rather odd and gentle way."[7]
Essentially the foil to Tychus Findlay's lack of ethics, Horner is a focal point for decency and freedom. Calm and reserved, he speaks the truth and rarely anything but the truth, and is a staunch believer in his leader's cause and ideals even if Raynor himself lacked faith. Despite his immense dislike for both the Dominion and its emperor, he never lets these emotions affect his better judgement.
A natural captain and decent strategist, it is not without reason he was put in charge of Hyperion, easily able to fend off and evade the zerg assault on Mar Sara in a short time.[5]
People often mistake/mistook Horner's name as "Jack Horner." Unlike the assumed namesake, he hates plums. He does have a chocolate eclair now and again though, and hates rations as much as any other terran.[7]
Notes
- When designing Horner, Blizzard Entertainment wanted him to be "very military". To represent this, inspiration for his attire was taken from historical fascist uniforms.[48] This would help distinguish him from the game's other major characters.[12] In terms of personality, he is the opposite of Gabriel Tosh.[49]
- Horner's portrait is available on battle.net for players who complete the Rebellion Mastery achievement.
- It was revealed at BlizzCon 2010 that an older polygon model of Matt Horner was ultimately used as a corpse in the background of the Escape from Mar Sara cinematic sequence.[50]
- Horner's face bears a resemblance to his voice actor, Brian Bloom.
References
|